Make Christmas Cards of Candles & Snowmen
Everyone loves the festive season and the giving and receiving of cards. But making your own is so much more personal and something the whole family can enjoy together. Candles are faster to create with the iron than you might imagine! Snowmen are fun characters to make. They can be decorated in so many ways. With encaustic art you can start simply and develop as your imagination gets more and more excited. You can also produce the cards in small (or larger) batches. Get everyone involved and have some Christmas fun long before the big day itself comes.
Approaches & steps
Candles
The method for making candles is quite simple but will require a bit of practise to become fluid in their creation. If you use a card for practising then you will learn faster. Practise until your results are consistent.
- Begin with an A6 white painting card and a block of red wax (No. 43 Bright Red is fine, or No.01 Crimson perhaps).
- Set the regular LOW working temperature on your painting iron, then turn it around so that the square end is at the top and the pointed end is closest to you. Tilt the iron handle inwards toward your other hand so that the straight edge is the only part that will touch when the iron is lowered.
- With the wax block flat on the work surface, run that straight edge across the wax block, melting colour onto the edge as you do so.
- Place the wax covered edge of the iron down onto the A6 card being careful to align the straight edge with the card’s straight side edge. The iron edge should now be resting on the card and parallel to the card’s edge. This ensures your candle will end up being vertical!
- Look at the farthest part of the resting edge, where the square corner of the iron’s base-plate is visible. To create the candle stroke, move the whole edge in parallel, watching that top corner, so that is describes an elliptical shape, returning back to the starting point to complete the stroke.
- That’s it. This should result in a candle “tube” shape that looks to be vertical and upright on the card. Watch the video and practise this until it is reliably repeatable. Try different widths, different shapes ellipses and also some overlapping. Let the iron move fairly slowly and carefully, but inflowing and steady manner. When this is “in your hands” then you have done the hard part.
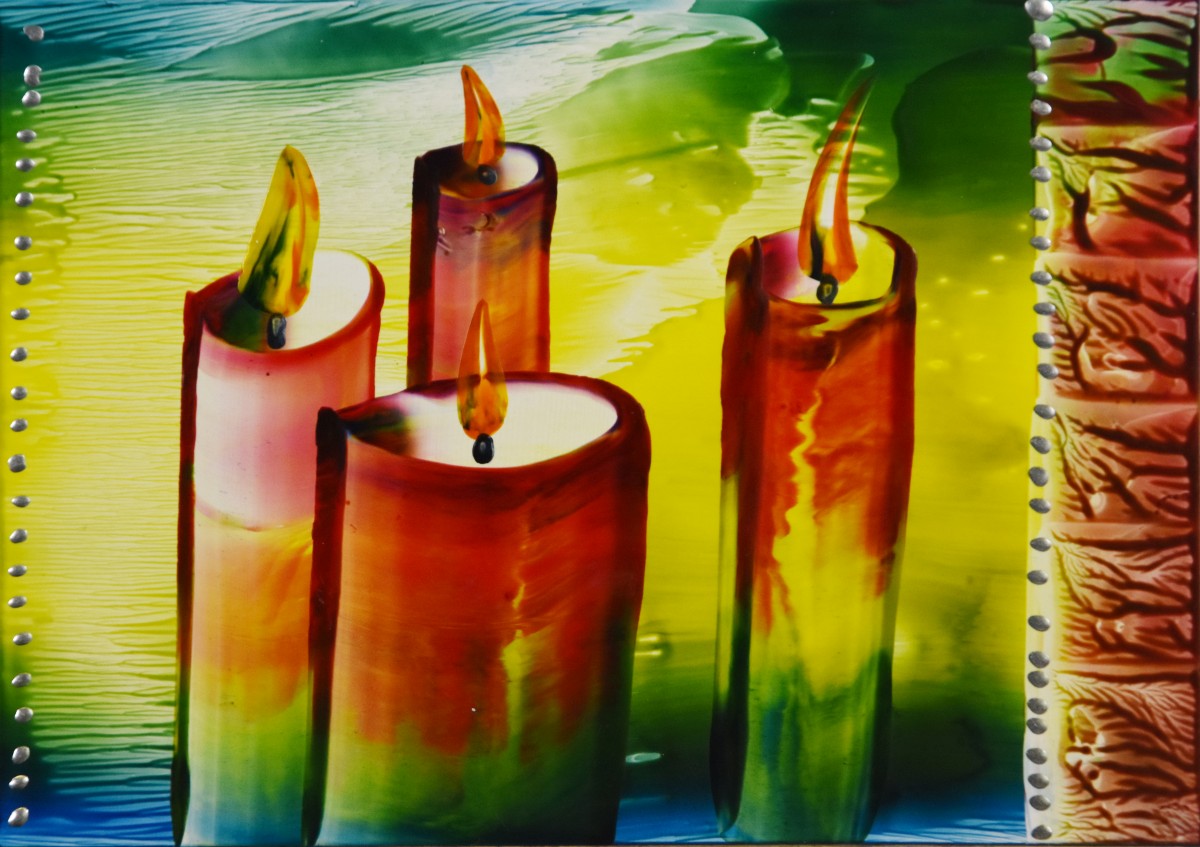
Group of candles
- First, you need to create the background. In this case, the A6 card created in the video uses mid yellow (44) sap green (45) and cyan blue (46). Melt these colours onto the iron base and then spread them onto the card surface. Work at this until a background you feel will be good for your candles is achieved. Remember to work the spreading along the length of the card so that the bands of colours remain slightly merged but still look clean and fresh.
- Now for the candles! You have already done them in the practise card above, so now you need to create perhaps three or four of them in a group on your background. They can be tall and skinny or short and wider. They cam be separate or overlapped. These are your choices. If you are unsure then consider sketching out a small layout and then using that as a guide. But don’t get stuck in too much precision! Let it flow.
- There is probably still red wax on the iron’s edge and the base close to that edge. In the video this was spread in a band down the far right side of the card. Then after cleaning the iron that red band was reworked with the back square edge to form a block pattern border. If there was not enough red on the iron then just add a bit more before patterning.
- Once your main candle group is created turn the card 180 degrees so that the tops of the candles are closest to you (upside down). Get some red or orange and yellow, dip the iron’s pointed tip into them to gather a little of their colours and then place that tip down, just away from a candle top, and flick it toward yourself in a sort of drag and lift motion. This should create a flame shape. Again, a little practise on your earlier card can be worthwhile. But remember that this works a little differently on unwaxed card compared to a waxed background. Practise, then take the plunge!
- With flames added you might like to use a Stylus fitted with a drawing tip to add a little bit of dark coloured wick between the candle and the flame?
- The final touches are decorative. Try using silver wax (26) to apply dots down the edges. These add a more festive feel.
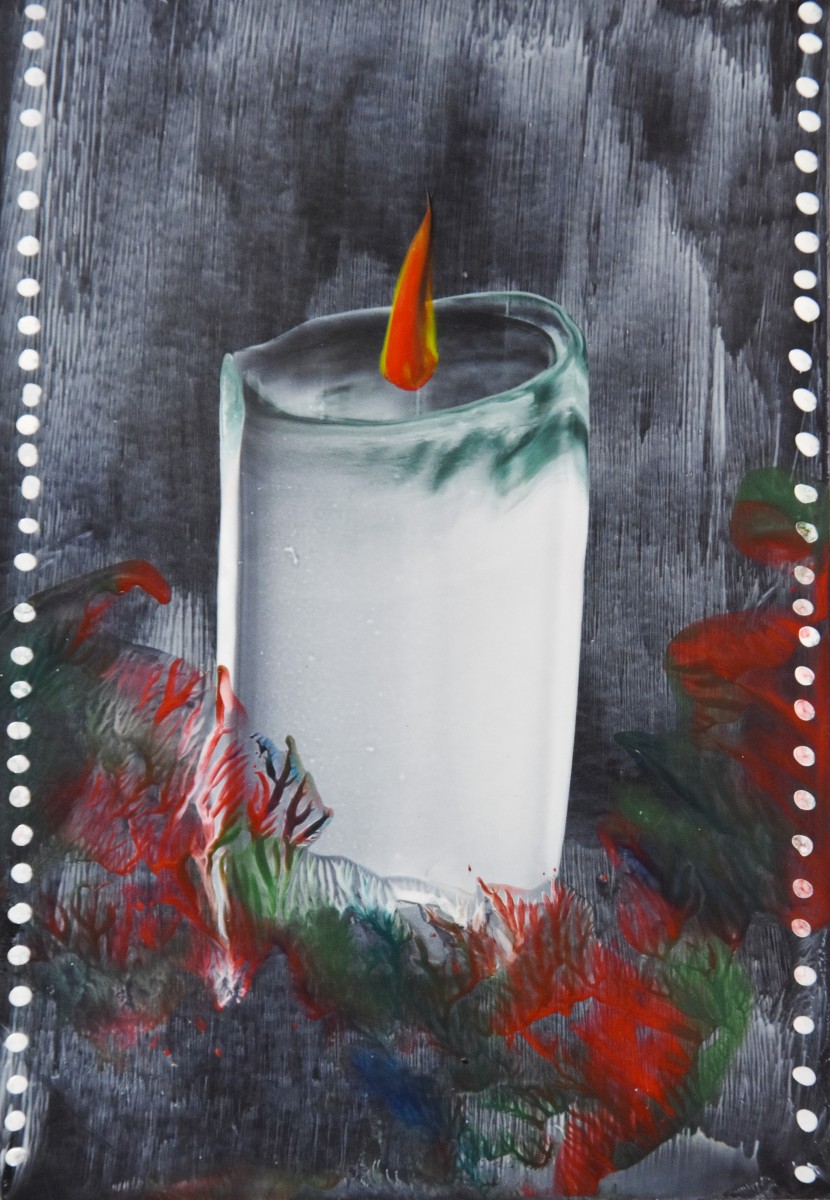
White candle on black card
- First cut an A5 encaustic art black card in half to make 2 A6 pieces.
- Melt just a little white wax (16) onto the iron and spread this thinly all over the black card to form a frosty looking effect. Choose which way up it looks best.
- Using the candle method explained earlier (above) run the iron edge through a white wax block to get it coated in molten colour. Then place that edge parallel to the upright card edge (so the candle is vertical) and then move the iron, keeping the edge parallel, and flow around the elliptical shape, ending back where you started. Remember that you can decide to make the ellipse thinner or fatter, narrow or wide. But usually, for a single candle, a nice wide result looks best.
- Turn the card 180 degrees to then take red and yellow on the iron tip and add the flame by flicking that colour our to form a long pointed triangle. It can curve if you wish and this adds a greater sense of movement.
- Melt some green (45) and red (43) onto the base of the iron and then dab this lightly around the bottom area of the card. Keep it as natural looking as possible.
- Finally take the Stylus with drawing tip and add rows of white dots down both edges of the card. Done!
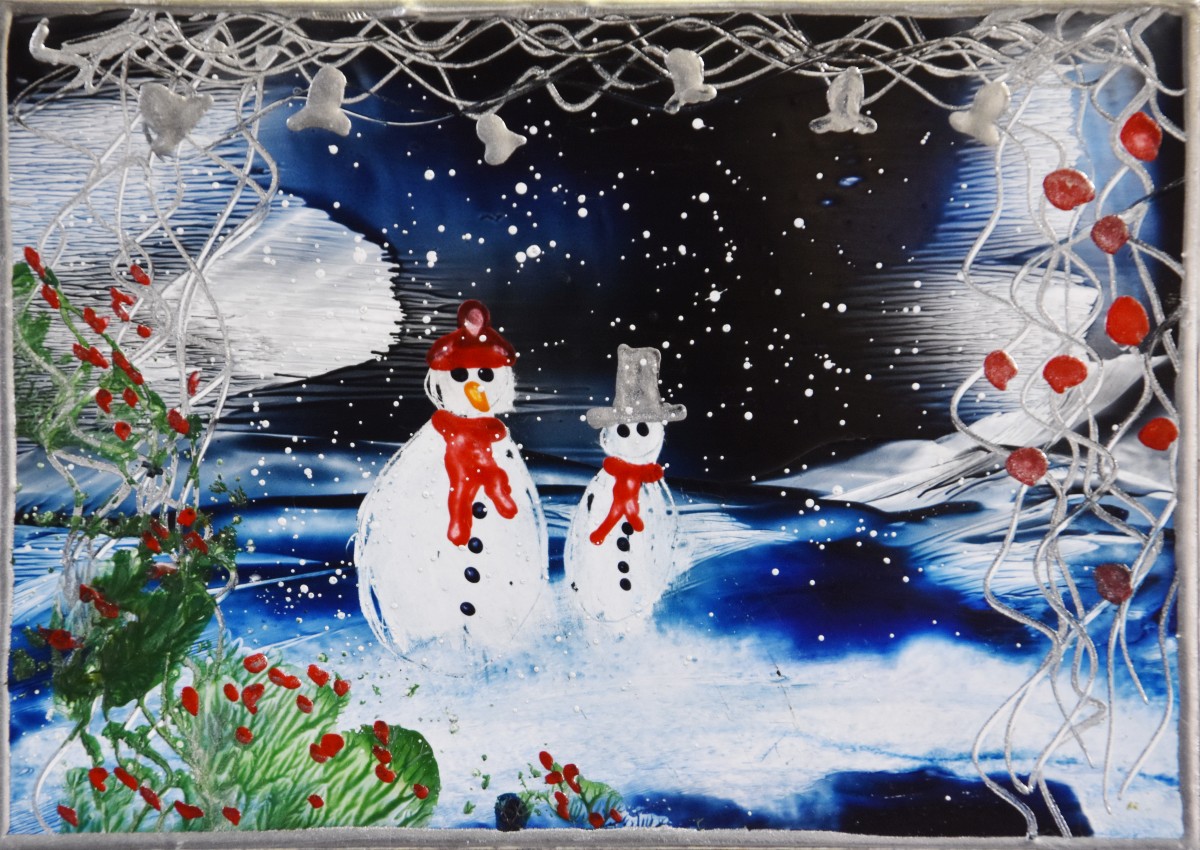
Snowmen
- Another great subject for Christmas is snowmen. Loved by children and most adults alike, these are fun to create in encaustic art and not too difficult. Something for a special card!
- Load the iron with Cyan blue (46), Indigo (47) and some Black (15). Spread this onto an A6 white card until you have created a pleasing dark background which still has a good coating of wax.
- Use the iron’s front curved edge and tip to create some hills type structures through the wax, making the lower third of the card lighter, but leaving the upper area dark and still with a good coating of wax.
- Take the metal scribing tool and draw in the outlines of your snowmen. Perhaps one larger and one smaller. Round heads and egg shaped bodies.
- Carefully scrape away the wax from inside these body shapes and wipe off the wax crumbs when you are finished.
- Twist a tissue into a hard pointed end and use this to rub away any remaining wax inside the body areas and also soften the overall look and feel of these main shapes. Ideally they will merge at their base, into the white snowy foreground.
- Use the Stylus or Stylus Pro with drawing tip fitted, to add clothing and features – scarves, eyes, nose, mouth, buttons, hats, gloves, anything you wish.
- Transform the iron into the mini-hotplate mode so that it rests on the handle base, secured in place by the nodes which will make an audible “click” as they locate and secure it.
- Melt some white wax onto the mini-hotplate and then load a natural hair brush (encaustic art hog’s hair brush) until it is filled with molten white wax.
- Use the white wax block as a hard edge that enables the brush to flick and spatter wax down onto the card. Watch the video carefully to see this action. Instant snow – be careful not to create a blizzard though!
- Take silver wax (26) and load the Stylus drawing tip so that you can add decorative wiggly lines down the edge bands of the card and also across the top. In these you can then add shapes, like the small bells, or perhaps stars, or even silver baubles.
- Red baubles reflect the red used in the scarves. Scrape off dark wax, back to the white card, before adding these coloured baubles. This will give the strongest, cleanest and most vibrant colours.
- Use the iron to dab on some sap green (45) for a little bit of holly. Decorate this with Stylus spots in red for the berries. The green warms the image up and adds a more festive feel. Green is also the complimentary colour of red, so it works well.
- The final work is to edge the card with silver. Put the iron back into mini-hotplate mode, melt a good puddle of silver wax on it (26) and then with eh card edge firmly touching the hotplate surface, swish it around through the silver. You should end up with a nice even edge line of silver.
- Repeat the silver edging all around the card. Then you are finished.
- Remember that you can use the wax sealer (Art. 99536001) to add extra protection to any waxed card.
Products Used
- Encaustic Art Painting Iron (EU plug: Art.99530100) (BS-UK plug: Art.99530102)
- Encaustic Art A6 painting card (Art. 99537100)
- Encaustic Art A5 Black card (cut in half to A6 by hand) (Art. 99538511)
- Encaustic Art Metal Scribing Tool (Art. 99531015)
- Stylus Pro (Art. 99530400) (EU plug Art. 99530400) (BS plug Art. 99530402)
- Brushes – Assortment (Art. 99534000)
- Workplace Paper (Art. 99537010)
- Encaustic Art Wax blocks
- Orange (Art. 99534903)
- Black (Art. 99534915)
- White (Art. 99534916) * this turns any translucent colour into an opaque tint.
- Silver (Art. 99534926)
- Bright Red (Art. 99534943)
- Mid Yellow (Art. 99534944)
- Cyan Blue (Art. 99534946)
- Sap Green (Art. 99534945)
- Indigo (Art. 99534947)
- Tissues from the local grocery – large size double ply tissues are ideal.